Instructions how to run check disk from Windows recovery console (Windows xp).
- If your PC is a laptop, ensure that your charger remains plugged in for the duration of this process
- With your PC powered up, insert the Windows XP installation or recovery CD-ROM into the drive, and then restart the computer.
Note: Cancel any messages or boxes that come up in Windows when the CD is inserted. - When you see “Welcome to Setup”, press R to start the Recovery Console.
- Type in your administrator password and press Enter when prompted. If the administrator password is blank (many are) then just press ENTER.
- At the recovery console command prompt type in:chkdsk /r
- Press Enter
- Do not interrupt this process and allow up to 2 hours for it to complete (although most PCs will be quicker than this)
Windows XP Recovery Console chkdsk command explained
So what does chkdsk actually do? Well it checks your internal hard drive for errors. These errors can stop your operating system (Windows) from starting or allow it to start but then crash shortly afterwards when it hits a bad area of the drive.
Here are a few of the ‘switches’ that can be used with chkdsk
   /F         Automatically fixes file system errors

   /X         Fixes file system errors on the disk but dismounts the volume first

   /R         Looks for and attempts to recover bad sectors

   /V         Displays the name and path every file on the disk

   /L:size    FOR NTFS ONLY - Changes the log file size to a specified number of kb

   /C         Skips directory corruption checks

   /I         Skips any corruption checks which compare directory entries to the
              FRS (file record segment) in the volume's MFT (master file table)
This is a verbose explanation but generally, in my experience, it is sufficient for most PC drive problems to run a chkdsk /r and this can be easily done from the recovery console if you have the XP CD ROM.

 Many emails about how to access the recovery partition on Dell Inspiron and Dimension PCs. I have noticed that Dell don’t give this information unless you pay for their premium tech support so here we go, hope this helps a few people…..
 The following is my procedure for restoring Acer laptops and desktops to factory settings. You will need to ensure that laptops are plugged in at the mains charger as this is critical.
 How to start a Windows PC in Safe Mode
 You have probably got a pop up box saying that jucheck.exe is trying to connect to the internet. This file checks for Java updates and is perfectly safe (jucheck = JavaUpdateCheck – get it?). Because of vulnerabilities in older versions of Java, you should install the updates whenever prompted.
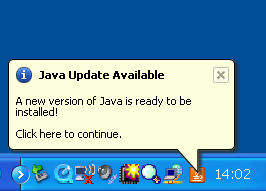 Otherwise, once installed (and it only takes a few minutes) you will have a better, safer version of Java on your PC. If you want to get the latest version for other computers and don’t want to wait until prompted, visit this official link: